

-
-
-
- Building blocks of the data model
- Basic concepts
- Classes
- Key fields
- Local lookup lists
- Fields and data types
- Defining the columns of a table
- Relations between classes
- Global lookup lists
- Filters
- Universal connected classes
- Deleting foreign records
- Class inheritance
- Storage of personal data on test and develop environment (scrambling)
-
- User interface versions
- Building blocks for user interface design
- Adding styles with a css
- Surrounding page
- Changing snippets
- Creating a custom login page (pre 3.4)
- Creating a custom login page
- Using velocity templates within the blueprint
- Create your own web pages
- HTML delivery requirements
- How to customize system mails
-
- Resource files
- Velocity - How does it work?
- Quick Velocity Tutorial
- Debugging velocity scripts
- Velocity Command Reference
- Script Editor Tutorial
- Using velocity for calculations
- Using predefined forms in a html design
- Velocity forms
- Data field identifiers
- Macros and methods
- Velocity library
- Velocity: using the #macro command
- velocity and xml
- Using AJAX in your velocity scripts
-
-
- Argon2 password conversion
- Introduction to security
- Secure development
- Security certification
- Security Exam
- Field properties concerning security
- Developing user groups securely
- Security considerations for user interface
- Secure file organization
- Securely using the request
- Cross Site Scripting (XSS)
- Other options concerning secure development
- Security analysis
- Secure deployment
- Secure application management
- Scrambling of testdata
- Anonymization of personal data
- Using robots.txt
- Permission settings
- Security measures
- Data encryption
-
- Search Engine Optimization
- OTP
- User Interface migration guide
- User account management
- Instructies voor implementatie van visueel editen van nieuwsbrieven
- Login as another user
- Support
- More information about moving to User Interface Version 4.0
- Standaard page layout
- Sections moved to layout
- Aanpassingen in release 2024-7
- Media library
- Aanpassingen in release 2024-10
- Analytics and Matomo
- Registration forms
- How to change names of classes and fields?
- Responsible Disclosure Policy
- How to upload a blob in Velocity?
- Aanpassingen in release 2024-2
- Instances
- Componenten in onze technologie
- Google Analytics
- Street and City helper (postcodecheck)
- Responsible disclosure-beleid
- Postcode check service (straat en huisnummer) kosten
- Expressions
- Regular Expression Reference
-
Mailbatches
The CrossmarX Application uses the Outgoing e-mail Helper to enable you to prepare and send mails in batches.
Mailbatch flow
1) Make a selection to whom you want to the mails to. Then start the email action.
2) Prepare the layout and content of an email.
3) Press either "Plan sending" or "Send".
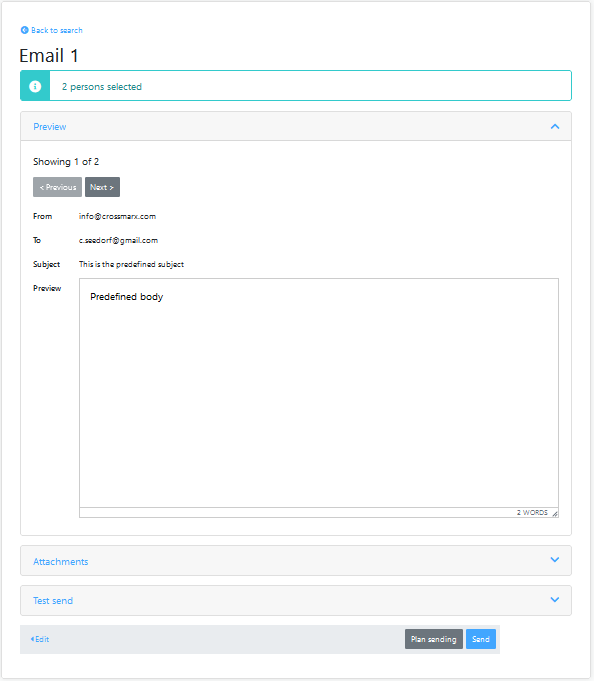
Select "Plan sending" and all mails are prepared and stored. After all mails are prepared a button "Send" will appear. Otherwise you select the corresponding details page of the mailbatch and find the "Send" button there. When you press "Send" all emails stored in files are sent out.
Select "Send" to do these two steps sequentially in one go.
The sending process offers all mails to a mailserver. The mailserver will start sending mails to the receivers. The sending of a large mailbatch can take multiple hours depending on how fast the mailserver is allowed to offer mails to receiving mailservers.
Bounced mails will be processed once per hour and processed in the statistics of the corresponding mailbatch.
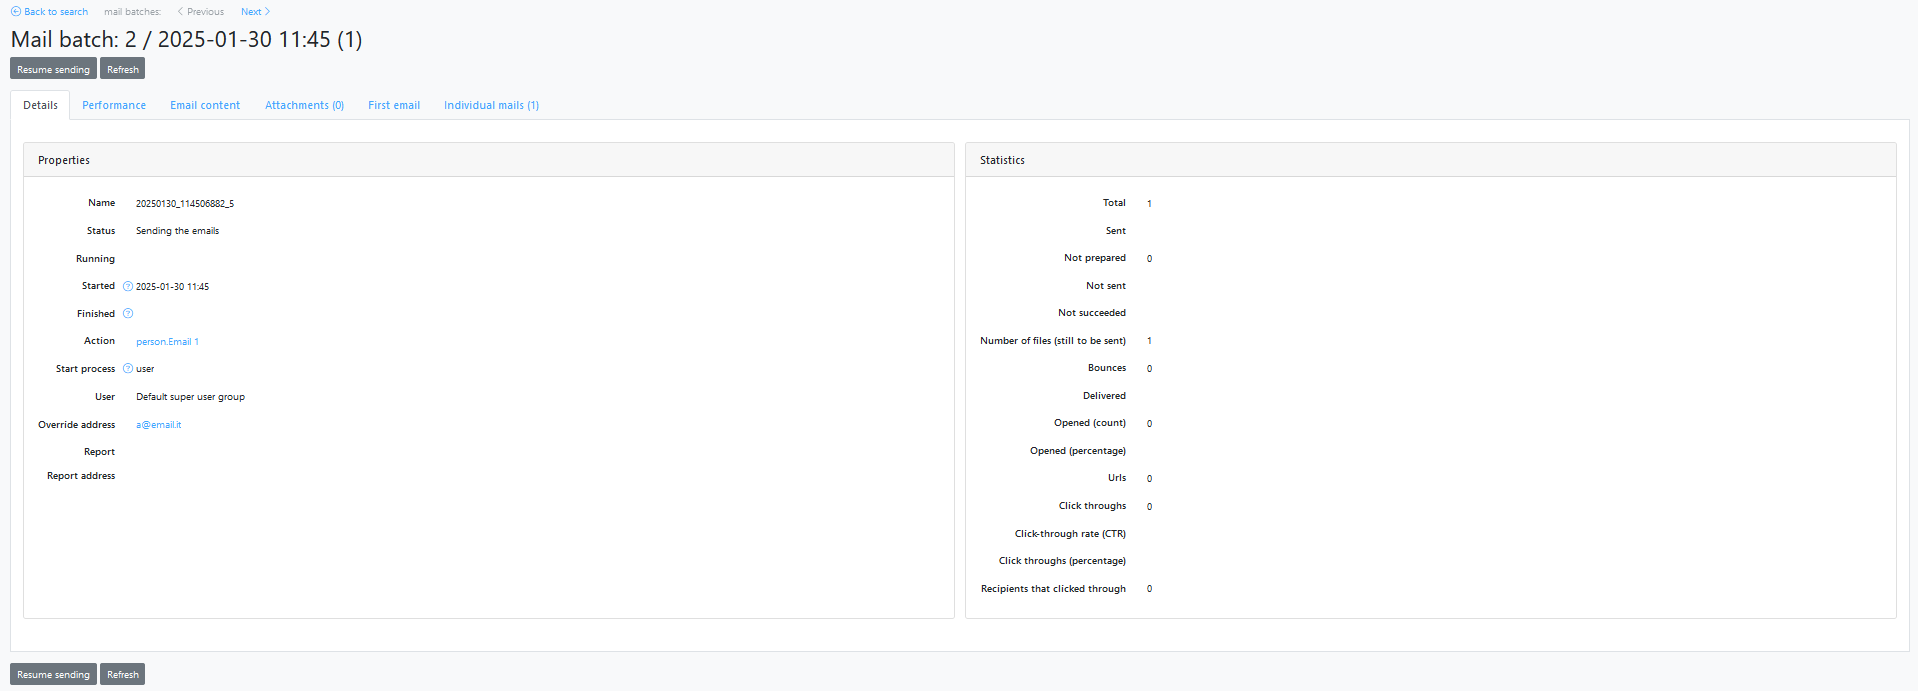
Mail batch details page:
B) Error handling
1) Failed during preparation:
The preparation of the mails for the mailbatch has failed. Try to find out why and try again. Best is to select a smaller batch first.
2) Failed after preparation
A failure during sending the emails is possibly caused by a mailserver error or a restart of the CrossmarX Application Engine.
Press "Resume sending". The sending will be restarted and will continue from last sent mail.
C) Report and status
The mailbatch details page contains a section called statistics. Here you can inspect totals and scores. By pressing the "Refresh" button you get the most recent view on the mailbatch status and statistics.
There are two ways Crossmarx registers that mails are opened.
- By incorporating a hidden .gif image in mails sent in a mail batch. Only the first time an email is registered as opened like this is tracked.
- By tracking links clicked in mails sent in a mail batch. This is called a "Click-through". If an email was registered as opened by a click-through, this is also tracked in the mail record.
The first method does not work if the e-mail client of the receiver blocks images in mails.